How are you all
I hope you are much better today. And I am well by the grace of the great God.
Even today I came to share something like this among you.
I hope today's tune will be useful for each of you. Because Photoshop is needed everywhere'.
 |
How To Change / Remove Image Background |
If you viewed this tune today, finish from start to finish. You will not be disappointed, today you can learn many things in Photoshop.
After today you no longer have to edit your photos or pictures from anyone. You can edit your own pictures beautifully from today.
Photoshop is software that is a collection of tools to present an image beautifully.
This allows any picture to be beautifully arranged. Images can be resized as needed. Photo lighting can be controlled.
Use of Photoshop: -
In general, its use is more or less the same in all cases. Using it, you can make any picture you need in less time.
Many people are making a living by doing these things through shops. Then you can understand how much use it is huge. And how important it is.
So I think everyone should have an idea about this Photoshop. This allows you to do your own work at any time. You no longer have to depend on others.
- How to learn this Photoshop?
You can learn this Photoshop in different ways. There are many organizations who are trained in this software. And at the end of the training he also gives 1 certificate.
You just have to be more discriminating with the help you render toward other people. You can also learn Photoshop online. Although you have to learn it yourself. Yet through your interest and effort and desire you can learn in a much better way.
You can also learn a lot about Photoshop through various videos or tutorials online.
Today I am writing a tune about Photoshop among you. But once you think about it, I have learned everything from online.
If I can, why can't you? You can too.
One day you too can learn ten people. But you have to be patient. So you can't be discouraged.
If you can't do it once, you have to try again and again.
Today's tune is for you. Today I will show you how to delete a photo background and add a new one.
This tune is very important today. If you follow my tune carefully today, you will be able to do this from today. You don't have to depend on others anymore. And the joy in one's work is so different. Pictures can be made as beautiful as you want. So let's get started ...
First step: -
 |
Photoshop PS |
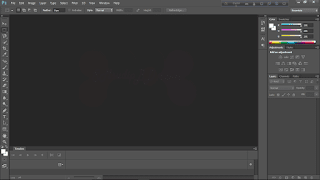
The skin shot above is not what you saw. Now open your Photoshop PS . You can see this after opening.You don't have to do Photoshop settings. It can be done as it is. But when you become an expert, you can make some settings for your convenience. So that you can easily get those tools at hand in less time.
Second step: -
 |
Open Your Image |
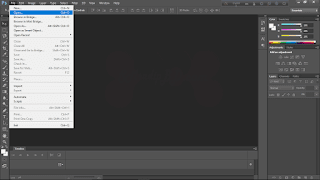
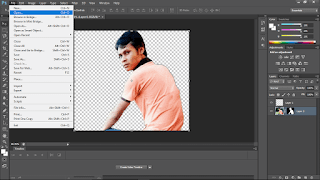
See the skin shot above. I clicked on File in the top menu bar of Photoshop so some options are seen. From these options I click on Open , I will input the image here that I will change / delete the background of the image. You will follow like a skin shot.
Step 3:
 |
Input Image PS |
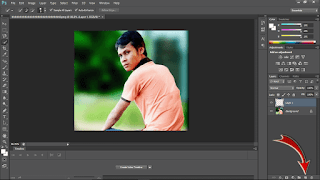
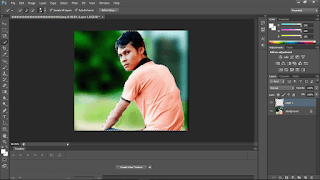
Look at the skin shot, the picture is open. Now I will delete the background of this image and then I will add another background to this image. Follow my step by step steps.
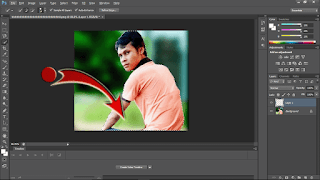
With the arrow I showed in the skin shot you will click on those tools. The name of this tool is New Layer. That means I'm taking 1 new layer here. You will do the same.
Step 4:
 |
Quick Selection Tools |
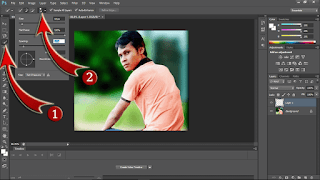
See the skin shot. In this step I have clicked Quick Selection Tools . After that, I have decided to keep the size of Quick Selection Tools . Hover the mouse over each of the tools and hold down a little, do not click. You will see the name of the tool that you have moved the mouse over. This way you can find Quick Selection Tools .
Fifth step: -
 |
Selection Image Area |
In this step you have to select the picture. For this, now click on the image with the mouse, you will see that the image is being selected.
 |
Remove Extra Quick Selection |
Look at the skin shot, the selection has gone beyond my picture. Now I just have to take the picture in the selection. For this, if you see that the selection has gone out of the original image, then you have to hold down Alt and click the mouse on the place where' the selection has gone out of the image. You will see that the selection is decreasing. The more times you click, the less the selection will be.
Step 6:
 |
Select Background & Refine Edge |
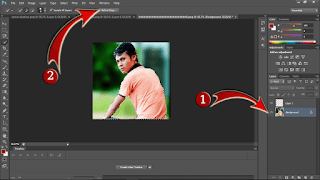
In this step I have explained where' you need to click with skin shot. You click there.
First click on Background then click on Refine Edge at the top .
Seventh step: -
 |
Layer Mask & Ok |
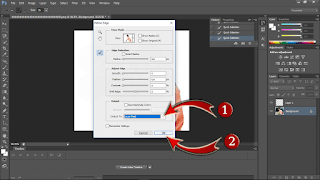
Just such a tab will open. Work as shown in the skin shot. First Layer Mask then click Ok .
Step 8:
 |
Background Mask & Open New Background |
See in the skin shot the background of the image has been deleted. Now you have to open another picture and take it slowly. And for this, you will open another picture in the same way that you first opened the picture and input it in Photoshop.
See Menubar at the top . File is written. Click to show some options. In the options you will see Open text, click to input a new image in Photoshop.
Ninth step: -
 |
Open New Background |
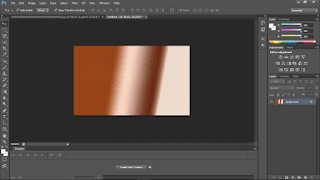
See, I have opened a new picture and input it. I will use this image as a background.
After opening the image, you need to go back to the image that was previously deleted from the background. And for this, look at the top, showing the names of two pictures. From there, click on the name of the first picture. Then go back to the first picture.
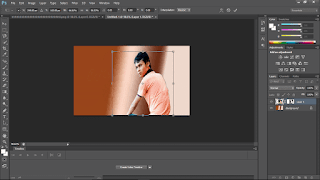
Now give you 1 click on the first tools bar. This is the first of all, the name Move Tools will see the first picture is selected. After the image is selected, bring the mouse pointer over the image, hold down the mouse pointer and move the image to the title of the second image. You will see that the 2nd picture is showing, so long that the 1st picture was pressed with the mouse pointer, now release it on the 2nd picture.
Step 10:
 |
Move Image New Background |
See the 1st picture has come on top of the 2nd picture. Now drag the image TK top, bottom, left and right
Place the 2nd picture as per your convenience so that the picture looks fit and beautiful. Don't overdo it.
Then click Move Tools again . A small tab will open. You will click on Apply .
Eleventh step: -
 |
Marge Image PS |
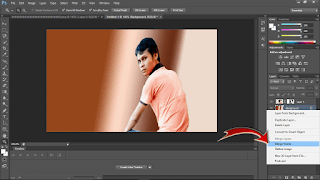
Move the mouse pointer over the background image as shown in the skin shot and right click the mouse. You will see that option is showing. You will click on Marge Visible as shown in the skin shot .
Twelfth step: -
 |
Save As Image ps |
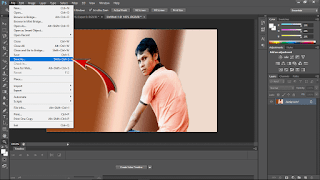
In this step you need to save the image. And for this you will click on File at the top . Will show some options. You will save your picture by clicking Save As from that option .
Finally, I would like to say that I am writing the tune for a long time. If you find it useful, don't forget to leave a comment.
There may be mistakes in the writing, I hope you will see me in a beautiful way.
Wishing everyone good health, I am ending today's tune here. All will be well. Stay tuned until I come up with a new tune. Stay well.
